
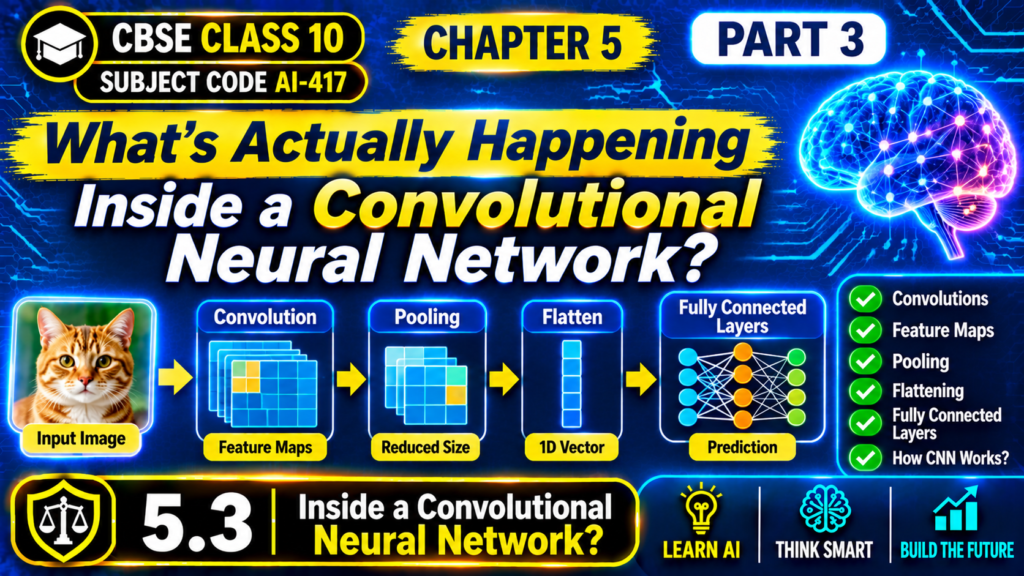
In Part 1 of Chapter 5, we learned what Computer Vision is and the four tasks that power it. In 5.2 we learned two no-code AI tools and we went hands-on and built a real image classifier with zero code, using Teachable Machine.
Today, in the final part of Unit 5, we go under the hood, how does a machine actually decide “this is a cat or dog” or “this is a can, not a bottle”? The answer starts with image features, runs through convolution, and ends with a Convolutional Neural Network (CNN), the architecture behind almost every modern Computer Vision system.
Image Features: What Makes a Pixel Patch Useful?
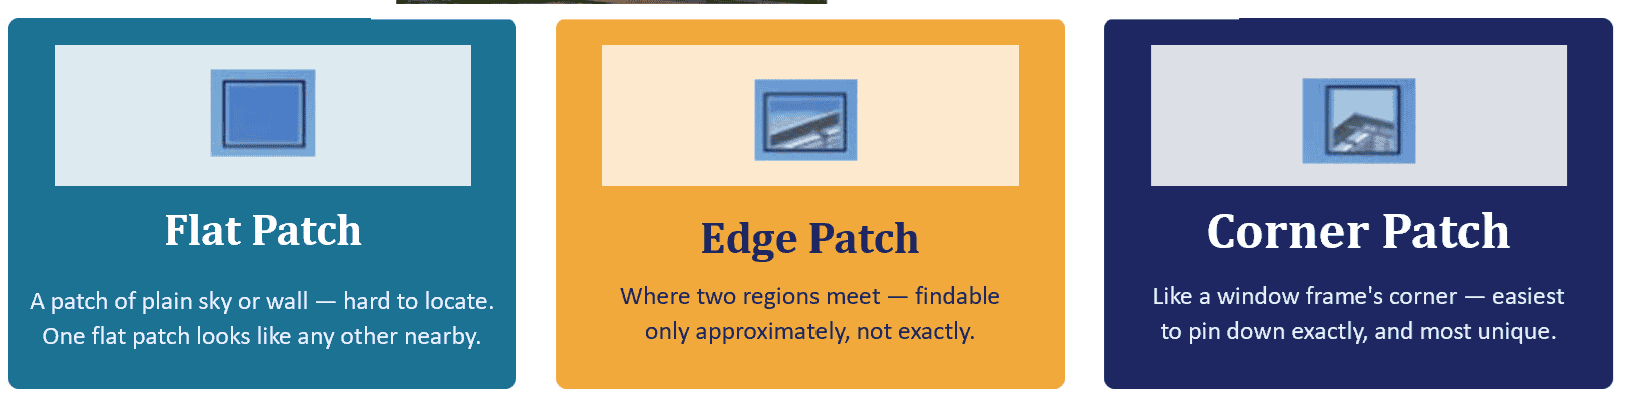
Imagine you’re looking at a security camera feed, and you’ve cut out a few small patches of the image to study:
- Flat patches like a patch of plain sky or a blank wall are hard to locate precisely in the image. One flat patch looks much like any other flat patch nearby.
- Edge patches where two regions meet, like the boundary of a rooftop are only findable approximately. You know roughly where the edge is, but not exactly where along that edge.
- Corner patches like the corner of a window frame are the easiest to locate precisely, and the most unique. There’s really only one place in the image that patch could have come from.
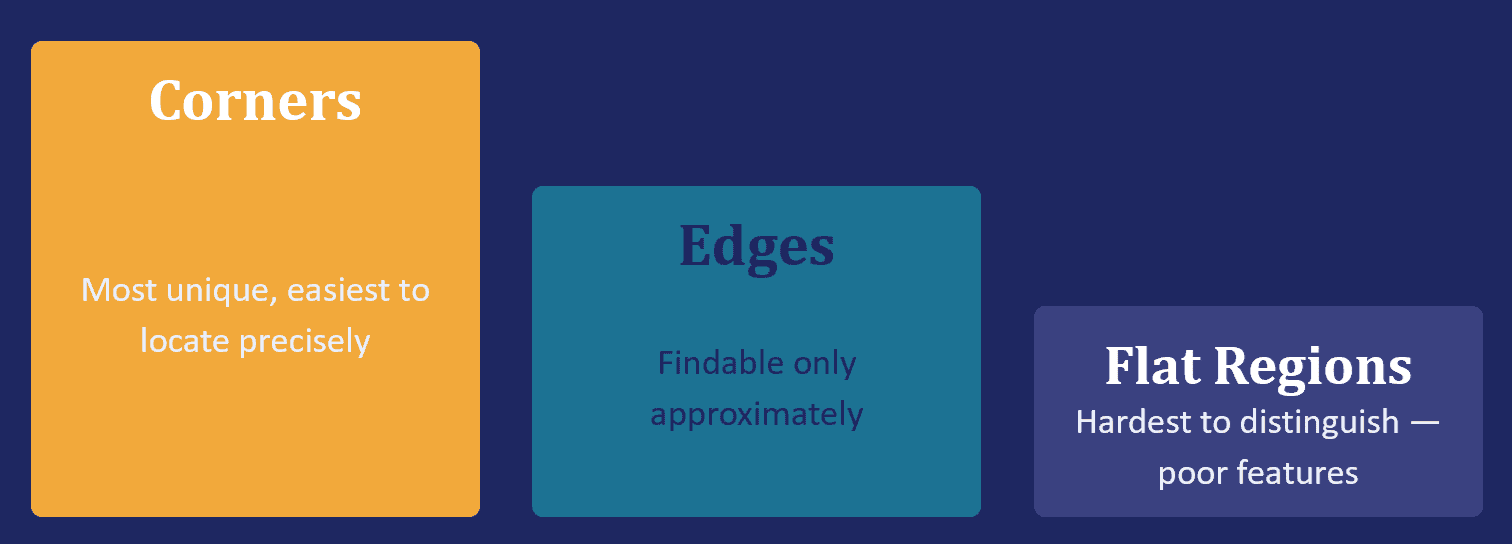
This gives us a simple but important conclusion: corners make the best features, followed by edges. Flat regions make poor features because they don’t carry enough distinguishing information. This is exactly why so many Computer Vision algorithms turn classical feature detectors to modern CNNs which are, at their core, hunting for edges and corners.
What Is Convolution?
Convolution is the mathematical operation that lets a machine actually go looking for those edges and corners. Formally, convolution is the element-wise multiplication of an image array and a kernel array, followed by a summation. It is usually written as:
I * K (Image convolved with Kernel)
A kernel (also called a filter) is a small matrix, think 3×3 or 5×5 that slide across the image, one position at a time. At each position, the kernel’s values are multiplied element-by-element with the pixel values underneath it, and all the products are summed to produce a single output value. Slide the kernel across the entire image, and you get a brand-new output image, one that has been transformed by whatever pattern the kernel is designed to detect.
Different kernels detect different things: some kernels sharpen an image, some blur it, and some are specifically built to highlight edges. This is the same core idea used in the Image Processing tools we discussed back in Part 1 and convolution is simply the mathematical engine underneath them.
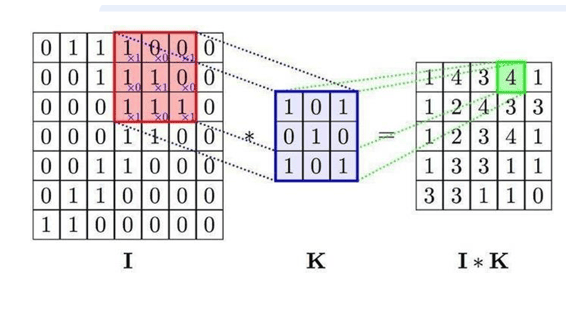
A practical wrinkle: if you slide a kernel across an image without any adjustment, the output image ends up smaller than the input, because the kernel can’t be centered on the pixels right at the border. The fix is called padding which extends the edges of the image with extra zero-value pixels before convolving, so the output image comes out the same size as the input.
What Is a CNN?
A Convolutional Neural Network (CNN) is defined simply as a network that takes in an input image, assigns importance via learnable weights and biases to various aspects or objects in the image, and differentiates one from another.
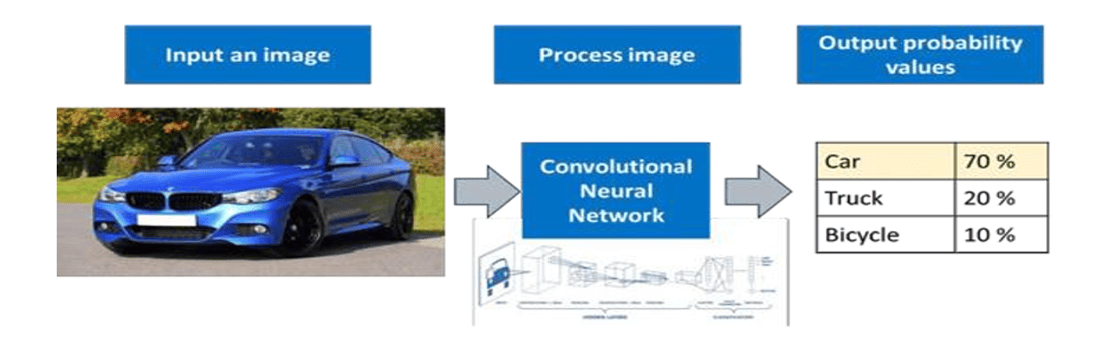
In other words, a CNN doesn’t just apply one fixed kernel the way a simple Image Processing filter does. Instead, it learns, through training, which kernels are actually useful for the task at hand like recognizing faces, sorting bottles from cans, or reading handwritten digits. Those kernels start out as random numbers and are gradually refined as the network sees more and more labeled examples, in much the same spirit as the Modelling stage of the AI Project Cycle we’ve referenced throughout this series.
The Four Layers of a CNN
A CNN is built from four kinds of layers, stacked one after another. Each layer does one specific job in transforming a raw image into a final prediction.
1. Convolution Layer
This layer extracts high-level features from the image like edges, color, gradient. Several kernels are slid across the image, and each one produces a “feature map” (also called an “activation map”).
2. ReLU (Rectified Linear Unit)
This layer removes negative values from the feature map and introduces non-linearity into the network. This has the effect of making edges more obvious.
3. Pooling Layer
This layer helps in reducing the spatial size of the feature map while retaining the important features. Pooling makes the image smaller and more resistant to small distortions or shifts. Two common types are:
- Max Pooling (keeps the largest value in each region)
- Average Pooling (keeps the average value).
4. Fully Connected Layer
This layer flattens the output of the convolution/pooling layers into a single long vector, and uses it to classify the image into a final label. For example, deciding “cat” based on the whisker and fur features the earlier layers detected.
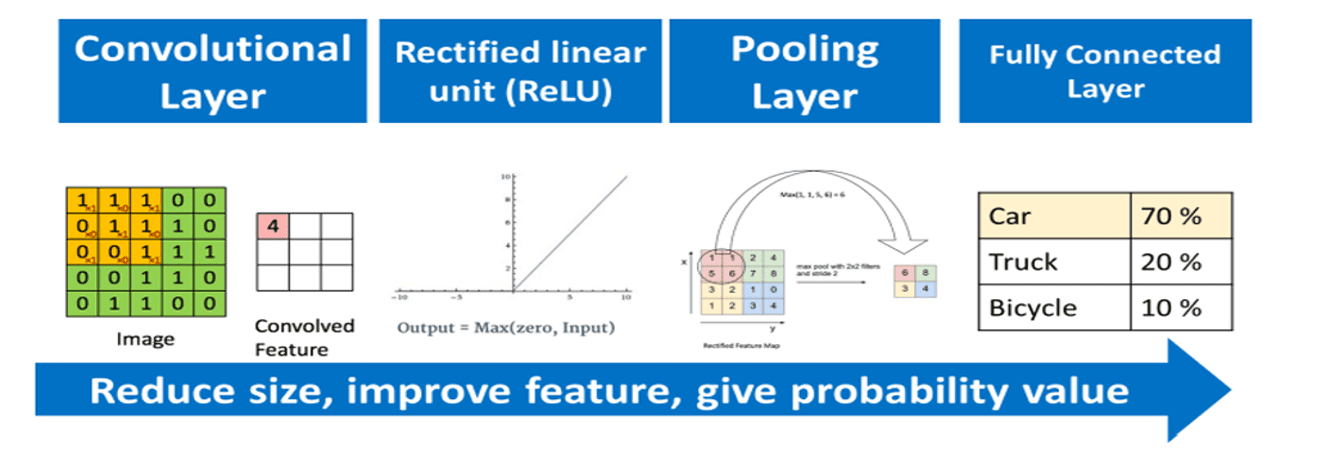
Put together, the flow looks like this: Image → Convolution → ReLU → Pooling → (repeat as needed) → Fully Connected → Prediction. Each pass through a Convolution + ReLU + Pooling block extracts progressively more abstract features. Early layers might detect simple edges, while deeper layers start recognizing shapes, textures, and eventually entire objects.
Python Libraries for Computer Vision
While tools like Lobe, Teachable Machine, and Orange let you build CV models with zero code, professional data scientists eventually move to writing that code directly and three Python libraries come up again and again:
1. TensorFlow
Google’s end-to-end open-source platform for machine learning. It provides the low-level building blocks, including the convolution operations we just learned about that let you construct, train, and deploy CNNs and other deep learning models at scale.
2. Keras
A high-level neural network API, often run on top of TensorFlow, known for being especially beginner-friendly. Keras lets you define a CNN’s layers: Convolution, ReLU, Pooling, Fully Connected, in just a few lines of readable code, without having to manage the low-level mathematics yourself.
Checkout Keras and TensorFlow implementation in actual code by clicking on the below link:
3. OpenCV (Open Source Computer Vision Library)
Originally developed by Intel, OpenCV is built for real-time Computer Vision tasks. Its applications include face detection, object tracking, and general-purpose image processing. The kind of practical, real-time work that sits alongside deep learning models in most CV applications, including tasks like augmented reality (recall the Google Translate example from Part 1). Check out how face detection works using OpenCV by clicking the below link.
https://nidhibansal1902.medium.com/how-face-detection-works-e6d3ad6757af
Together, these three libraries cover the full pipeline: OpenCV for capturing and pre-processing images in real time, and TensorFlow with Keras for building, training, and running the CNNs that actually make the predictions.
Test Yourself
- What is the objective of the Convolution Layer in a CNN?
- Which CV task involves labelling every pixel of an object?
- What do mean by resolution of an image?
- What is the core task performed in Image Classification?
- What is the primary purpose of the ReLU function in a CNN?
- Object detection and handwriting recognition fall under which broader category?
- What does a pixel value represent in a digital image?
- In an 8-bit image, what is the range of possible pixel values?
- In a grayscale image, a pixel value of 0 represents which color?
- In an RGB image, a pixel value of 0 in all three channels represents which color?
Stay Tuned!!
Stay tuned for next chapter, where we deep dive in to Natural Language Processing(NLP).
Click below for the YouTube video for Part 3 of Unit 5:
For any queries and clarification, kindly email us at datasciencehorizon@gmail.com
Keep learning and keep implementing!!

